WATER HEATER INSTALLATION – PART 3 INSTALLATION OF NEW WATER HEATER
Topics:
– Derange setup
– Discharge pipe on the P&T valve
– Hooking up the water
– Installing a vent line
– Connecting the gas line
– Making sure that everything went well
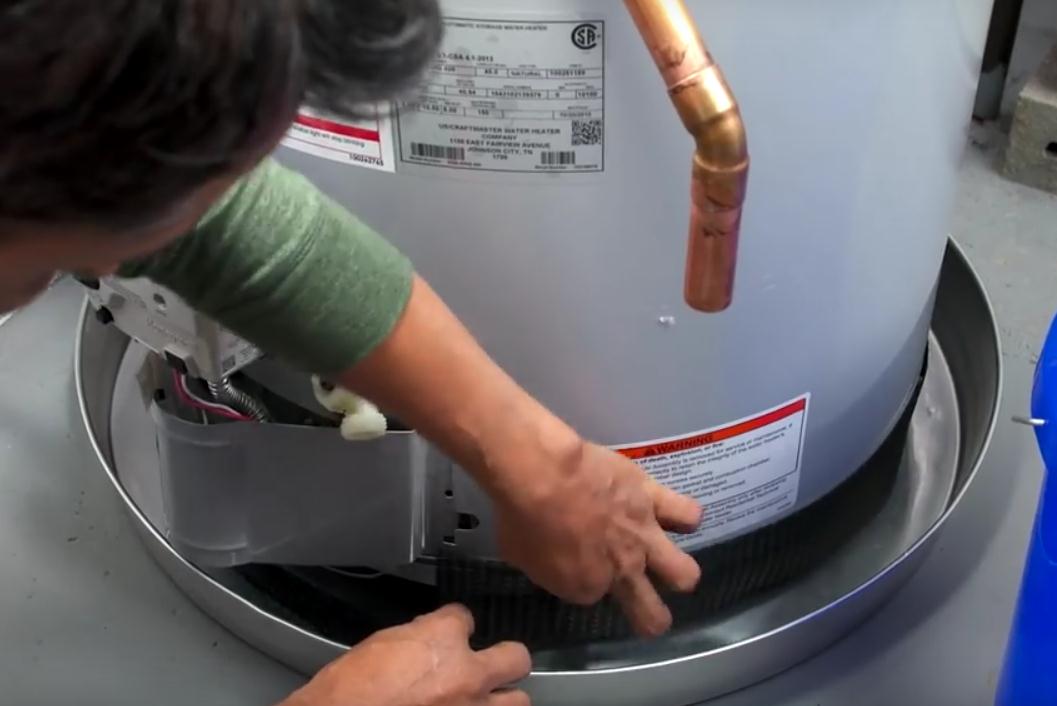
So you have removed old tank and mounted new one using earthquake straps as shown in part one and part two of this How To. Now its time to connect pipes and fitting to your new water heater.
If you are not sure how to apply instructions on this or you do not have time to do heater installation, leave it to professionals, call us for advice or to schedule repair. SUPER MARIO PLUMBING give you highly professional service.Derange setup
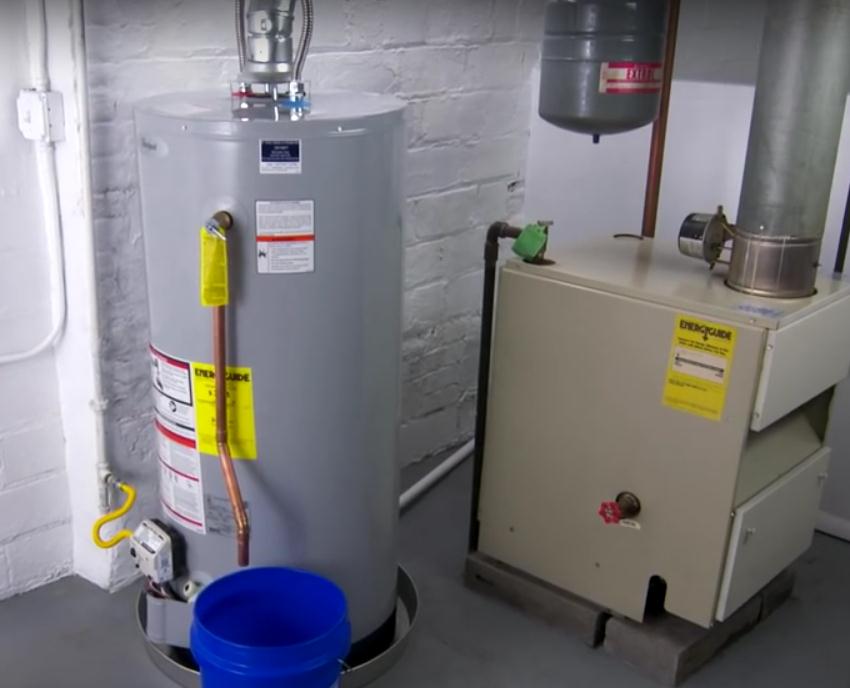
Make sure that you previously mounted your water heater in the drain pan. Avoid possible flooding by routing to a drain.
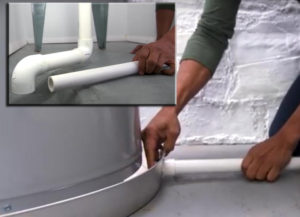
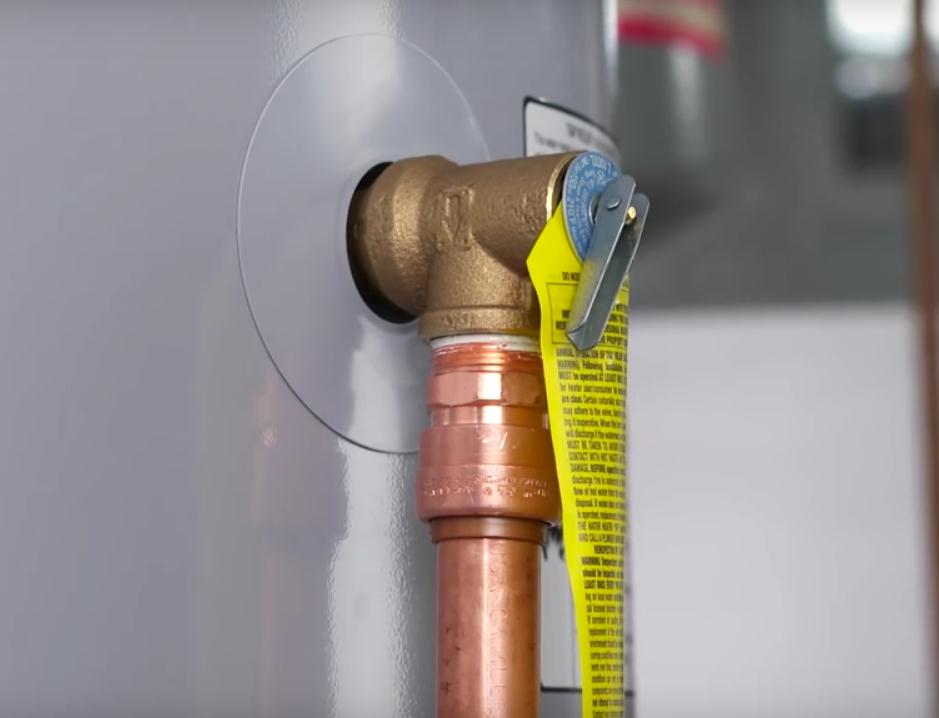
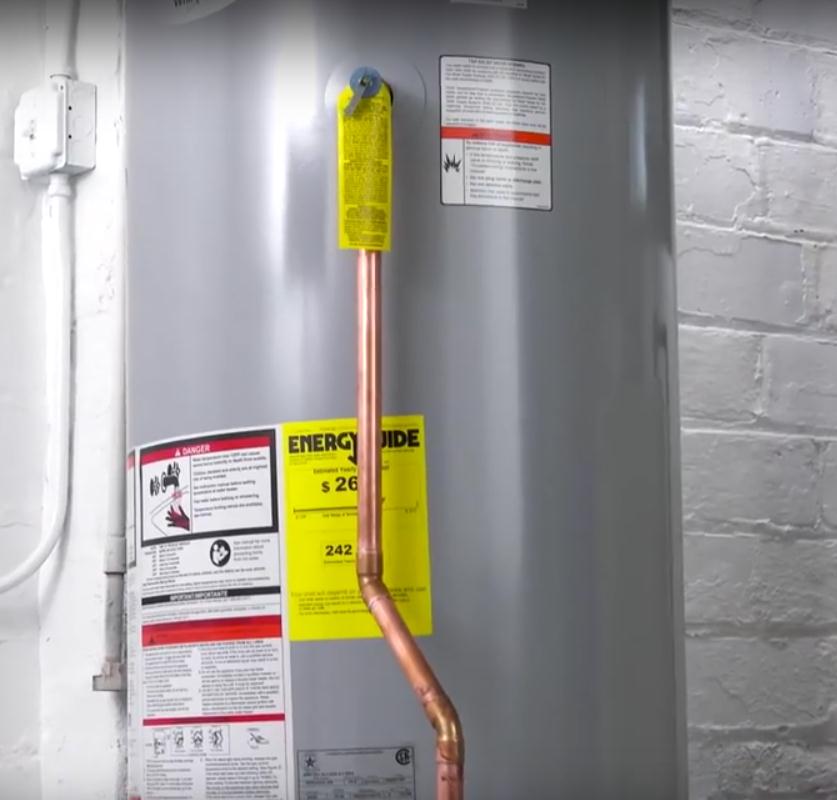
Discharge pipe on the P&T valve
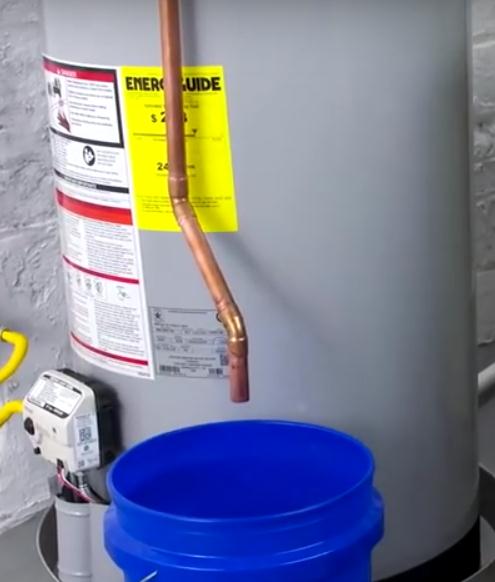
Install the discharge pipe on the P&T valve. This valve opens when the temperature and pressure are too high.
 Route the discharge pipe to the floor drain. If you do not have a floor drain, place a bucket under the discharge pipe.
 Distance from the end of the pipe and the bucket should not be less than 6’’.
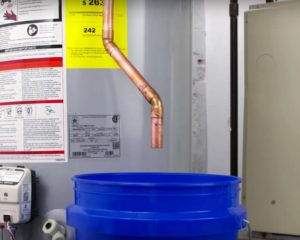
Hooking up the water
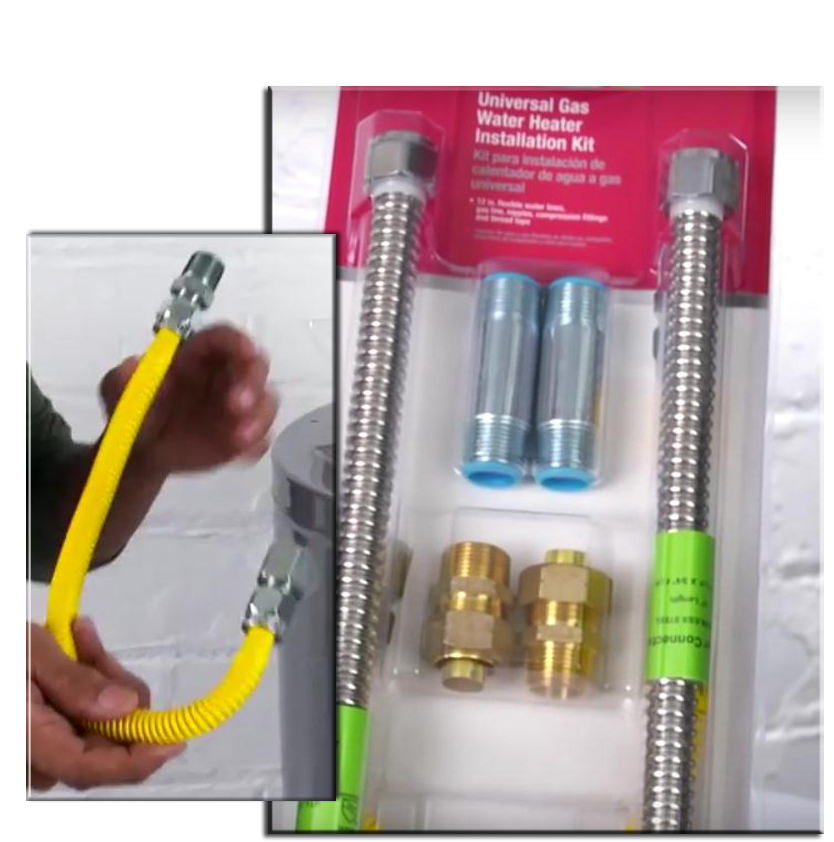
Connecting the heater to water line is easy with the flexible hose kit, those connections are recommended for earthquake safety. When purchasing a kit, make sure that set also has a gas hose.
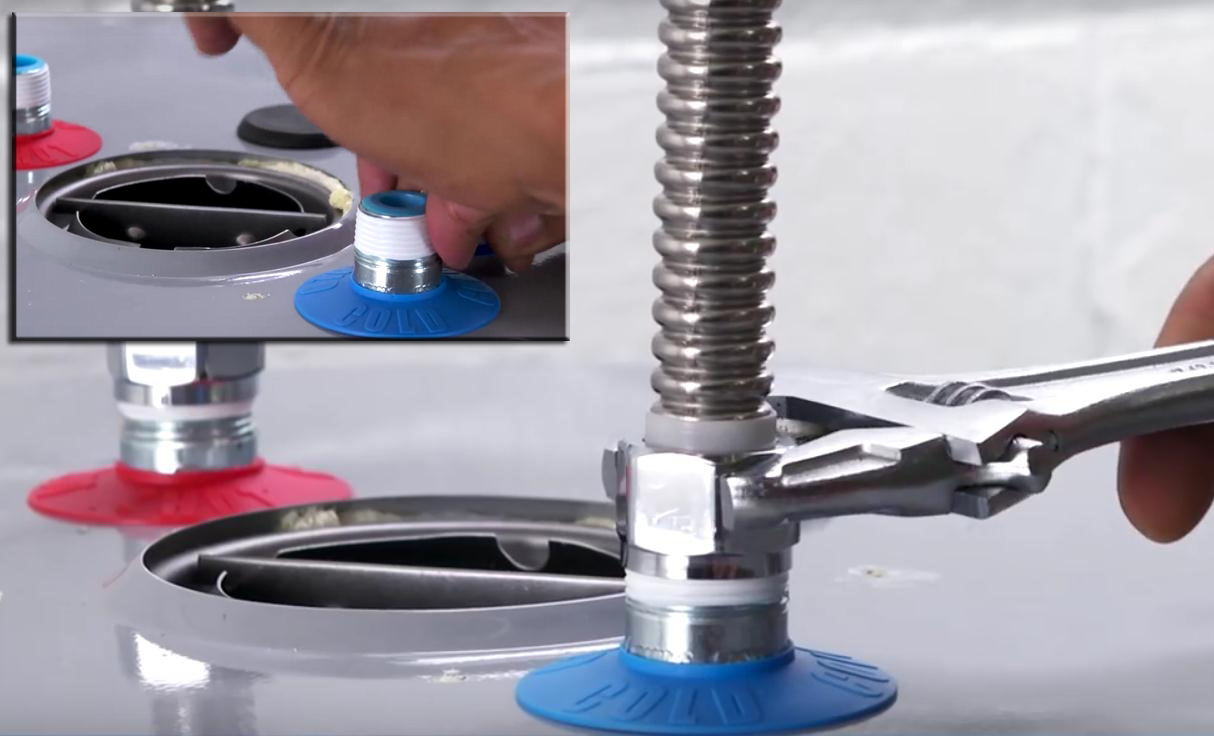
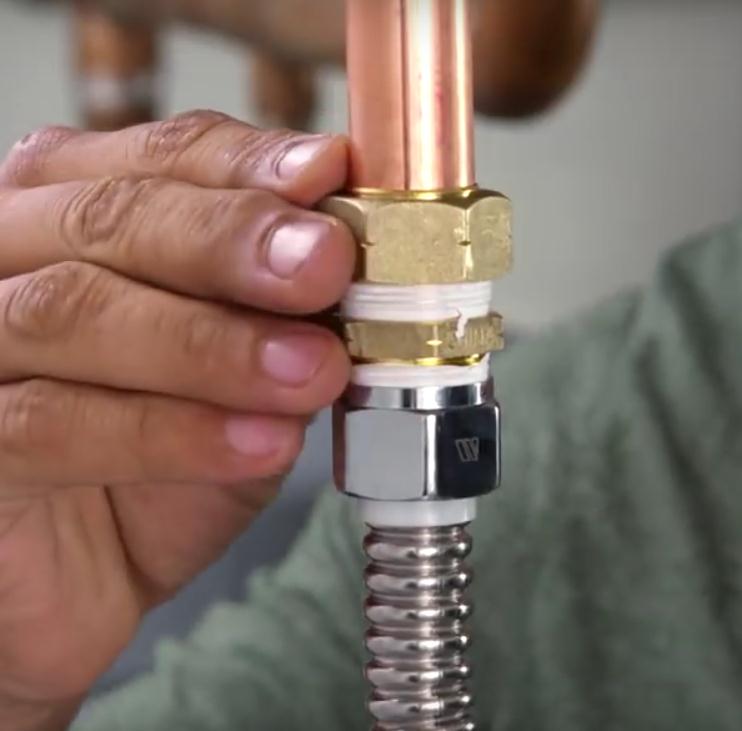
 Apply plumbers tape on the threads for water connection on your water heater and attach the flexible hoses on both, cold and hot connections, by using a wrench.
 Add plumbers tape to the connector body threads and fasten them to the hoses using a wrench.
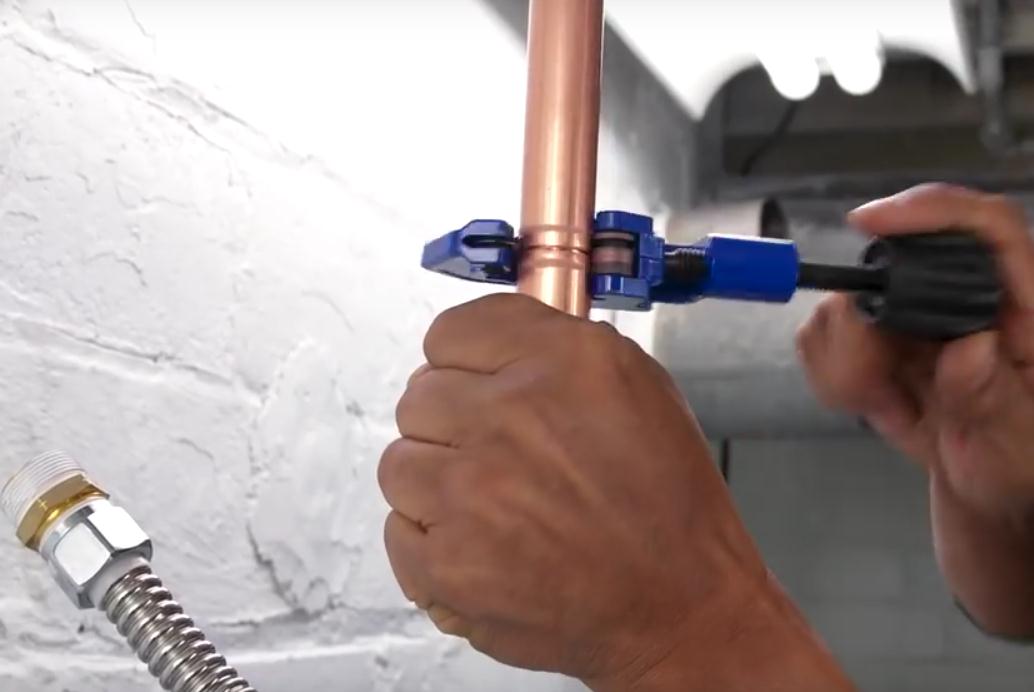
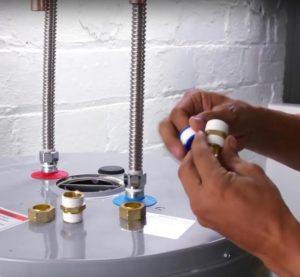 Now you need to connect the hose to a water pipeline. Hold the hose to the pipe, hose should have a little slack. Mark cut line using a pen and cut the pipe on marked length and remove the burrs so the pipe end is smooth.
 Slide the compression nut on to the pipe, push the pipe into the fitting and tighten the nut.
Turn on the cold water supply and check your connections for leaks. If everything is good continue filling the tank of a water heater.
Slide the compression nut on to the pipe, push the pipe into the fitting and tighten the nut.
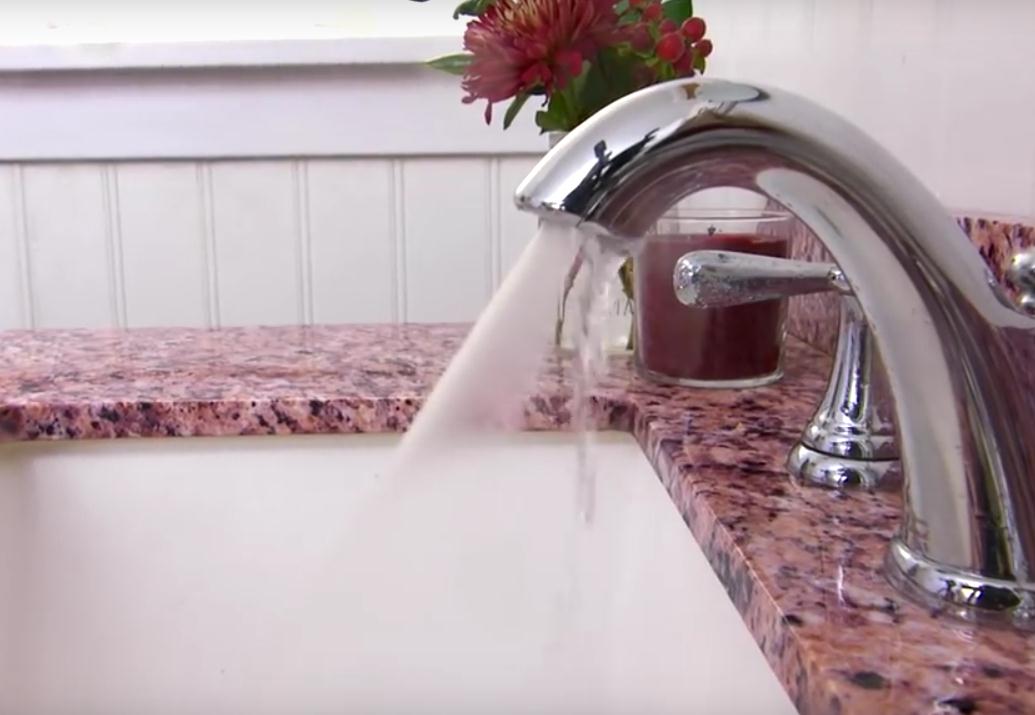
Turn on the cold water supply and check your connections for leaks. If everything is good continue filling the tank of a water heater. Open a near by faucet hot water side while filling the tank, when water starts running from the faucet, the tank is full. Let it run few minutes to deaerate the tank.
Installing a vent line
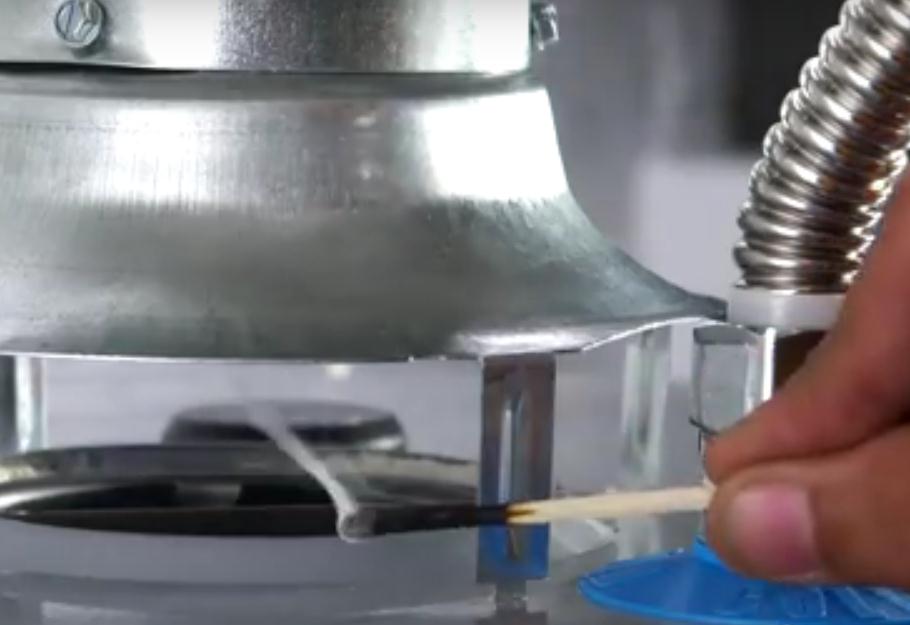
Secure the venting to the new exhaust hood.

Perform a vent test. If smoke from the match doesn’t go straight into hub you have a vent problem, check your vent system maybe it’s clogged or you have some other issue. If you are not sure call a professional. It is a good idea to have CO (carbon monoxide) detector near the heater. Install the air filter.
Connecting the gas line
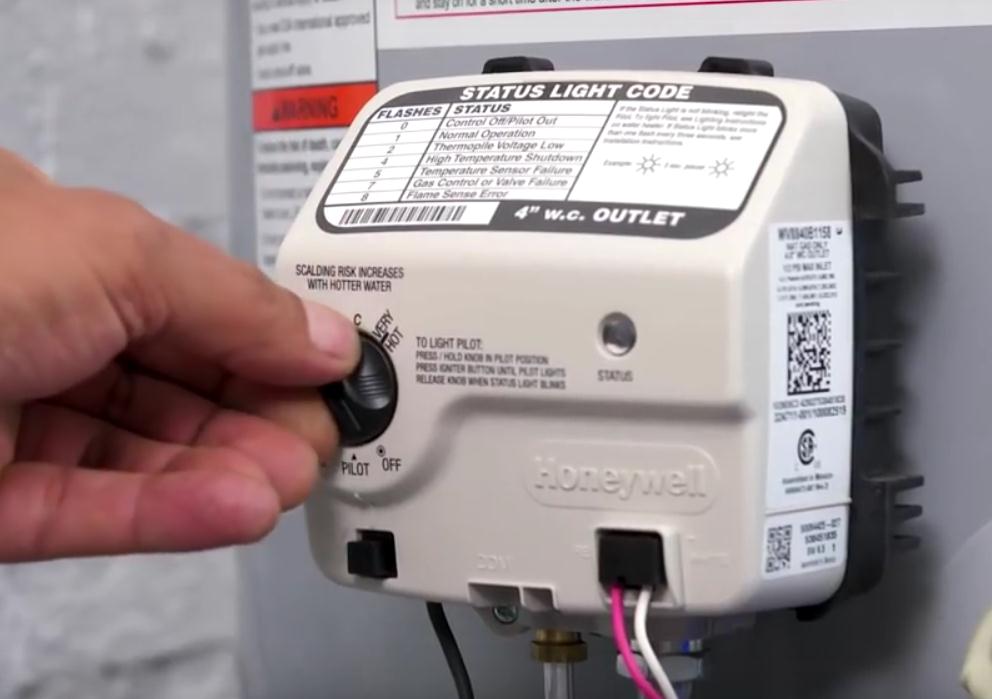
When connecting the gas line, first make sure that tanks control knob is off.
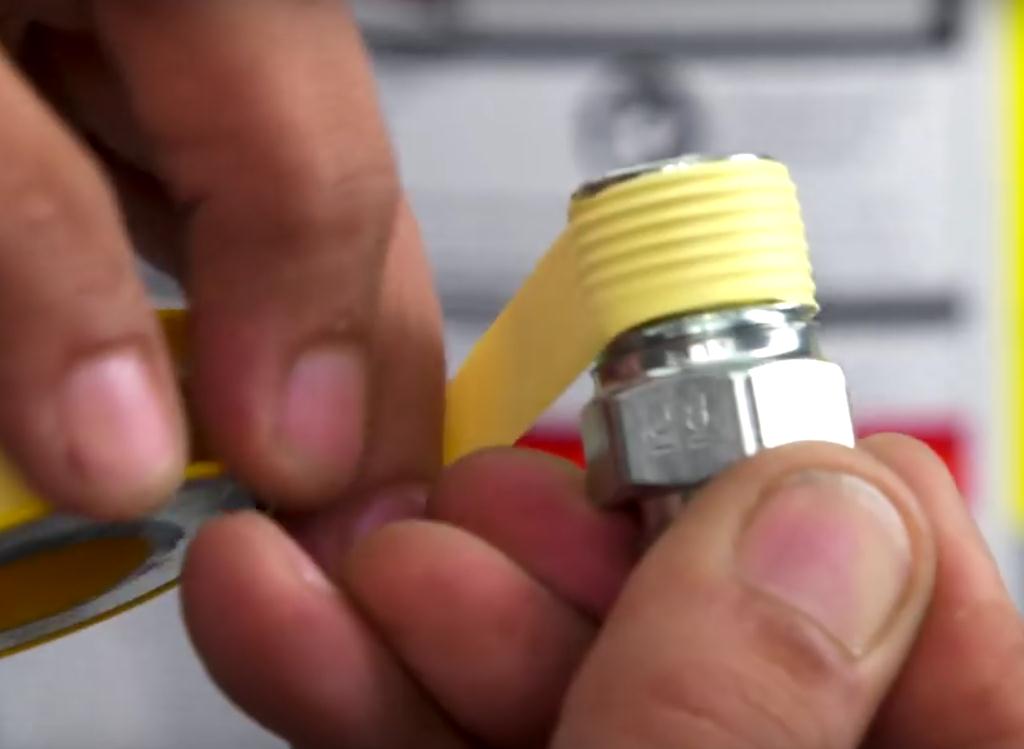
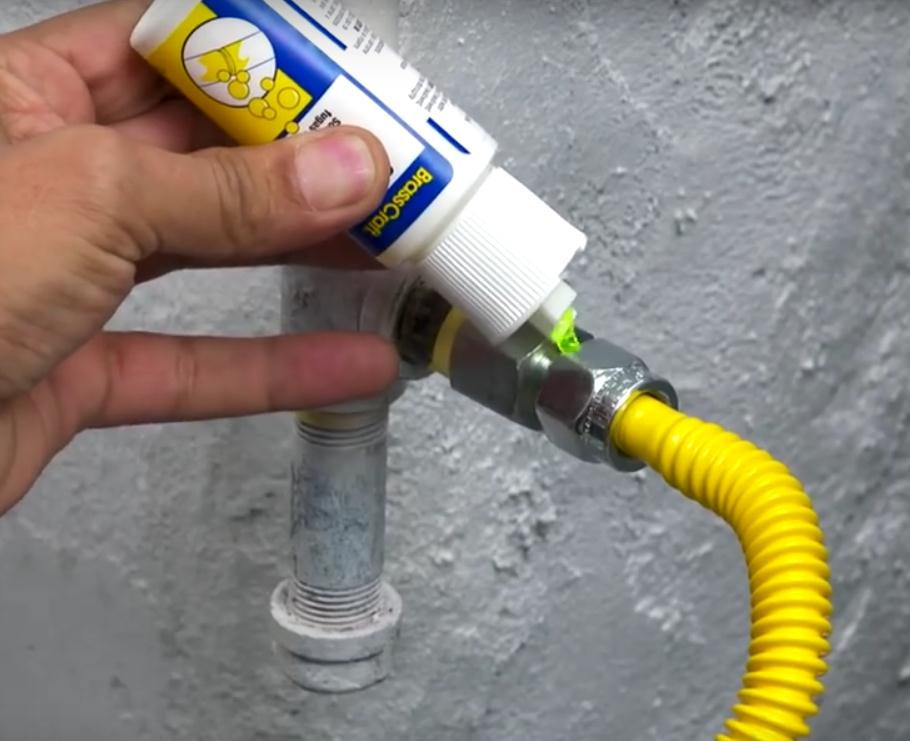
 Wrap the threads of the fittings with the gas plumbers tape.
 Screw one flare nut into the control valve and the other flare nut into the gas line. Then connect the gas hose. At this stage you can turn the gas supply on.
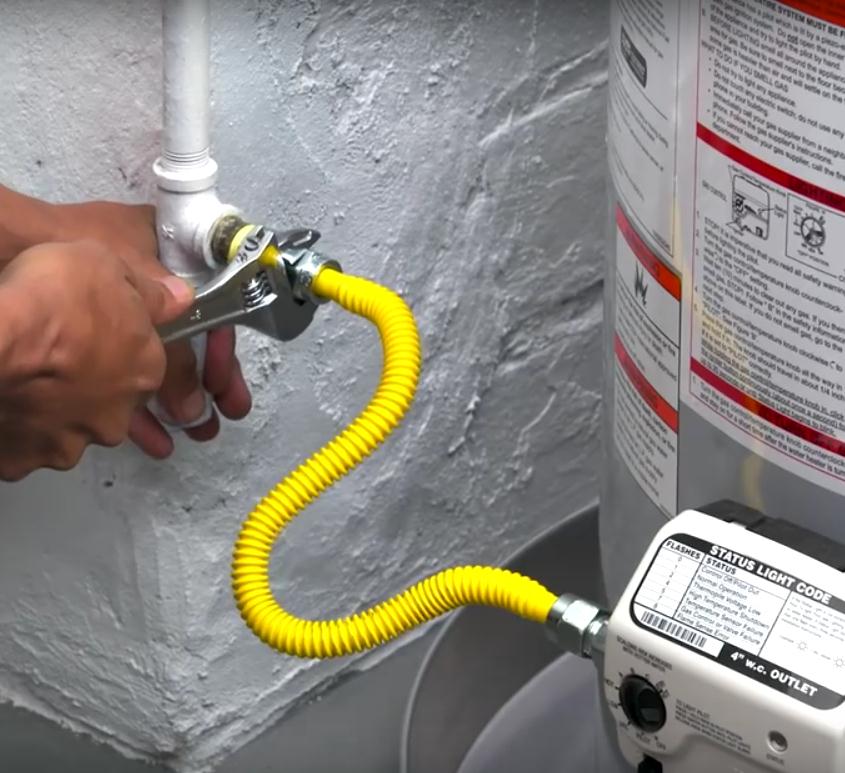
 Turn the gas supply on. Check connections using leak detector. If there is any leak it will bubble. If so tighten the connections or repeat complete gas supply line installations steps using more gas plumbing tape on the threads of the fittings.
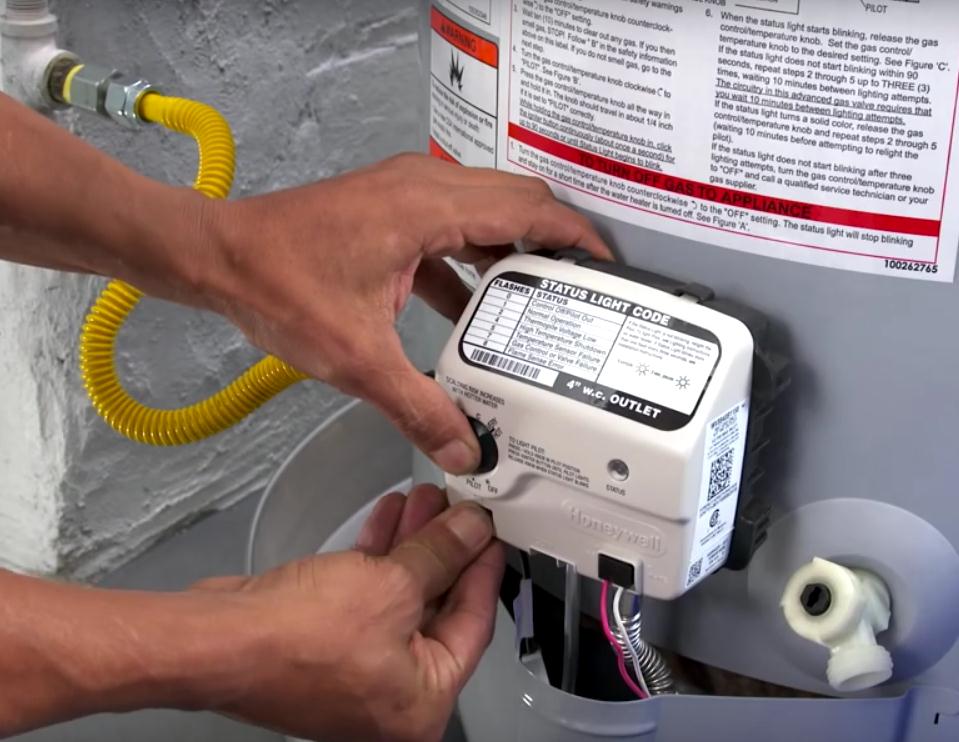
 To light the unit, depending on the knob type you have, turn the automated – pilot mode and push the ignition button. Check your manufacturer documentation in details for this.
Recommended temperature setting can vary but 120°F should be suitable.
To light the unit, depending on the knob type you have, turn the automated – pilot mode and push the ignition button. Check your manufacturer documentation in details for this.
Recommended temperature setting can vary but 120°F should be suitable.
Making sure that everything went well
After a few hours, check your connections for leakage on the water and gas side. Also check your P&T valve for leaking. If it leaks, this means that it is reached its pressure set pressure, use your pressure regulating valve on the main water supply line to drop the pressure to recommended value. Usually. 60-70psi will do.
 DECLAIMER: Installing/removing gas, water and electrical line can be dangerous if not done professional, hazards exist during or after installation, SUPER MARIO PLUMBING does not recommend you to do it yourself.