When it comes to shower floor pan installation, the process of putting in a shower pan can seem daunting. However, with the right guidance, installing a concrete shower base can be a straightforward task. From understanding the necessary materials to mastering the steps involved, this helpful handbook will walk you through the process effortlessly, providing an important foundation and serving as a tool. Whether you’re a seasoned DIY enthusiast or a novice looking to tackle this project for the first time, this comprehensive resource will equip you with the knowledge and confidence needed to successfully install your shower floor pan.
ay goodbye to uncertainties and embrace the satisfaction of completing a professional-quality shower base installation on your own.
Key Takeaways
- Ensure the subfloor is level before installing the shower pan to prevent future issues.
- Test-fit the shower pan before securing it in place to confirm proper placement and floor drain.
- Use a gasket and drain screen to prevent leaks and ensure a watertight seal.
- Conduct a thorough leak test after installation to catch any issues early on.
- Secure the shower pan properly to avoid movement and potential leaks over time.
- Attention to detail during the final touches can enhance the overall look and functionality of your shower installation.
Preparing Your Space
Clearing Area
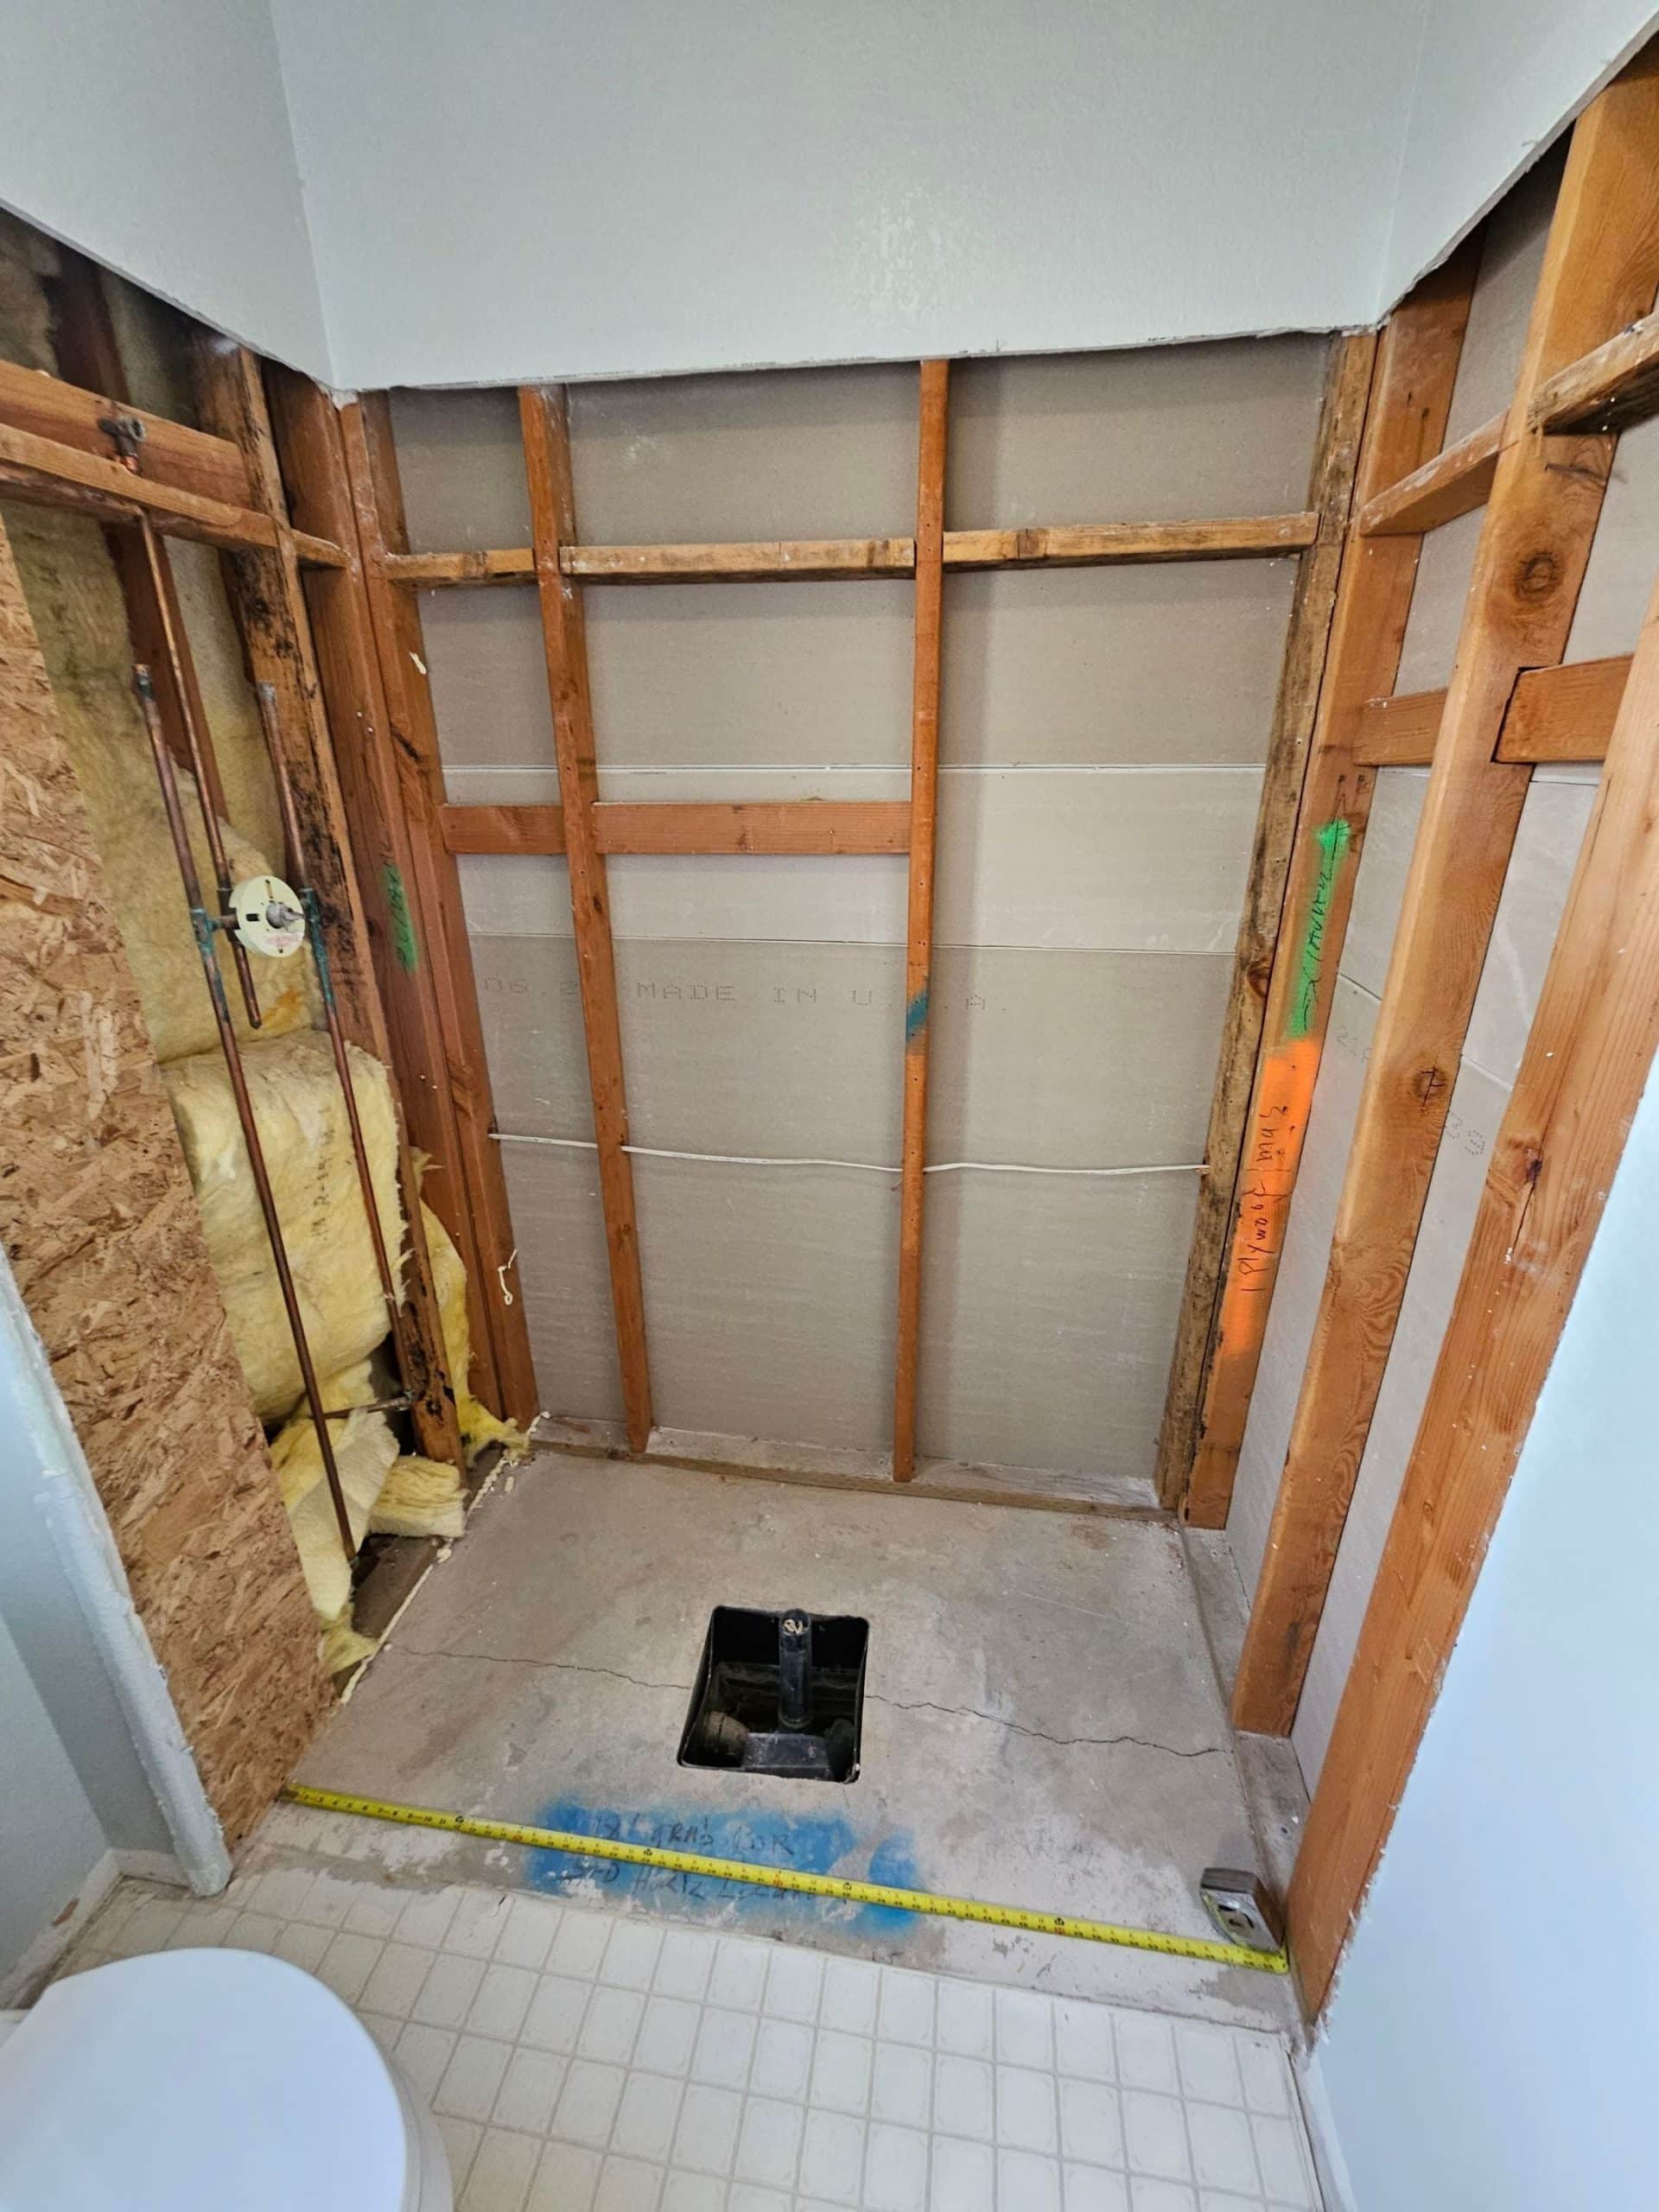
Clear the space where you plan to install the shower floor pan. Remove any debris or obstructions that may hinder the installation process. This step ensures a smooth and level surface for the shower pan.
Ensure that the area is clean and free of dust and dirt. A clean workspace helps in maintaining the quality of the installation and prevents any issues with the shower pan in the future.
Gathering Tools and Materials
Gather all the necessary tools and materials required for installing the concrete shower base. This includes items such as a measuring tape, level, trowel, waterproofing membrane, mortar mix, and the shower pan itself.
Having all the tools and materials ready before starting the installation process saves time and allows for a more efficient workflow. It also prevents interruptions during the installation, ensuring a seamless process.
Ensuring Ventilation
Ensure proper ventilation in the workspace where you will be working on putting in the shower pan. Proper ventilation helps in dissipating fumes from materials like mortar mix or adhesives, creating a safer environment for work.
Good ventilation also aids in drying times for materials like waterproofing membrane or mortar mix, promoting faster curing and setting of these substances. This contributes to a quicker overall installation process.
Leveling the Subfloor
Checking Flatness
Use a level to ensure the subfloor is flat and even across the entire area. Any unevenness can lead to issues with the shower pan installation later on.
Applying Self-Leveling Compound
If there are low spots or areas that are not level, consider using self-leveling compound. This compound helps to create a smooth and level surface, essential for a successful shower floor installation.
When applying the self-leveling compound, follow the manufacturer’s instructions carefully. Pour the compound onto the subfloor and use a trowel to spread it evenly.
Drying Process
After applying the self-leveling compound, allow it to dry completely before proceeding with the next steps. The drying time can vary depending on humidity levels and the product used, so refer to the manufacturer’s guidelines for specific drying times.
Once the compound is fully dried, you can continue with the shower pan installation process. A smooth and level subfloor is crucial for ensuring that the shower pan sits securely and prevents any water leakage in the future.
Drain Flange Setup
Check Fit
Inspect the floor drain and ensure it fits snugly into the designated space on the shower base. Verify that there are no gaps or misalignments between the drain flange and the base.
Apply Caulk
Using a suitable caulk, create a tight seal around the drain flange. Apply the caulk generously but ensure it doesn’t overflow to prevent any future leaks that may compromise the integrity of the shower floor.
Secure with Locking Ring
After applying the caulk, firmly secure the drain flange in place by attaching the locking ring. This step is crucial as it prevents any water from seeping through and causing damage to the subfloor below.
When installing a shower floor pan, ensuring a proper setup of the drain flange is essential for maintaining a watertight seal. By carefully checking the fit, applying caulk, and securing with a locking ring, you can prevent potential leaks and water damage in the future.
Shower Pan Test-Fit
Dry-Fit
Before proceeding with the installation, dry-fit the shower pan to ensure it fits snugly in the designated space. This step helps in identifying any potential issues early on.
Take the shower pan and place it in the desired location, ensuring that it aligns correctly with the shower walls. This process allows you to make any necessary adjustments before permanently installing the pan.
Verify Alignment
Check whether the shower pan aligns accurately with the existing drain hole. Proper alignment is crucial to ensure effective drainage and prevent any future leaks or water damage.
If there are any discrepancies in alignment, make the necessary adjustments to ensure a perfect fit. Ensuring that the drain hole matches up correctly will contribute to the overall functionality of the shower system.
Cutting Hole in Subfloor
In some cases, you may need to cut a hole in the subfloor to accommodate the drain pipe. This step is essential for seamless connectivity between the shower pan and the drainage system.
Measure and mark the precise location where the hole needs to be cut, taking into account the size of the drain pipe. Use appropriate tools to make a clean and accurate cut to facilitate proper drainage.
Securing the Pan
Apply Adhesive
Apply adhesive or mortar generously to the designated area for the shower pan. Ensure even distribution for proper adhesion.
Press the shower base firmly into place, allowing the adhesive to set and bond securely with the subfloor.
Check Levelness
Double-check the levelness of the shower pan in all directions using a level tool. Adjust as needed to achieve perfect balance.
Ensure that the shower pan is securely positioned before proceeding with further installation steps.
Gasket and Drain Screen
Installing Gasket
To start, install the gasket around the drain pipe, ensuring a tight seal to prevent water leakage. The gasket acts as a protective barrier between the shower pan and the drain pipe, maintaining a watertight connection. Make sure to press the gasket firmly into place, creating a secure fit that will withstand daily use without any issues.
Placing Drain Screen
Next, place the drain screen securely over the drain hole. The drain screen serves as a filter, preventing debris from clogging the drainage system while allowing water to flow freely. Position the drain screen centrally over the drain hole to ensure proper water drainage during showers. This step is crucial in maintaining the functionality of your shower floor pan in the long run.
Alignment and Sealing
Ensure proper alignment and sealing of both the gasket and drain screen to prevent any potential leaks. A secure fit between the gasket, drain pipe, and drain screen is essential for maintaining the integrity of your shower floor pan installation. Check for any gaps or loose areas that could compromise the waterproofing of your shower pan. Proper alignment and sealing will guarantee a durable and leak-free shower floor pan for years to come.
Leak Testing
Filling with Water
Fill the shower pan with water to check for any leaks. This simple yet crucial step involves pouring water into the pan and letting it sit. Look closely for any signs of water escaping or seeping through the shower floor. This method helps identify potential leaks before they become a more significant issue.
Drain Inspection
Inspect the drain area for any signs of water seepage. Check around the edges of the drain and along the seams for any moisture that could indicate a leak. Addressing these issues promptly can prevent water damage and expensive repairs in the future. Ensure that the drain screen is properly installed to avoid any leakage.
Immediate Action
Address any leaks immediately before proceeding with further installation steps. If you notice any water escaping from the shower pan or drain area, take immediate action to fix the problem. Ignoring leaks can lead to water damage, mold growth, and structural issues. It is essential to resolve any leaks promptly to ensure a watertight shower installation.
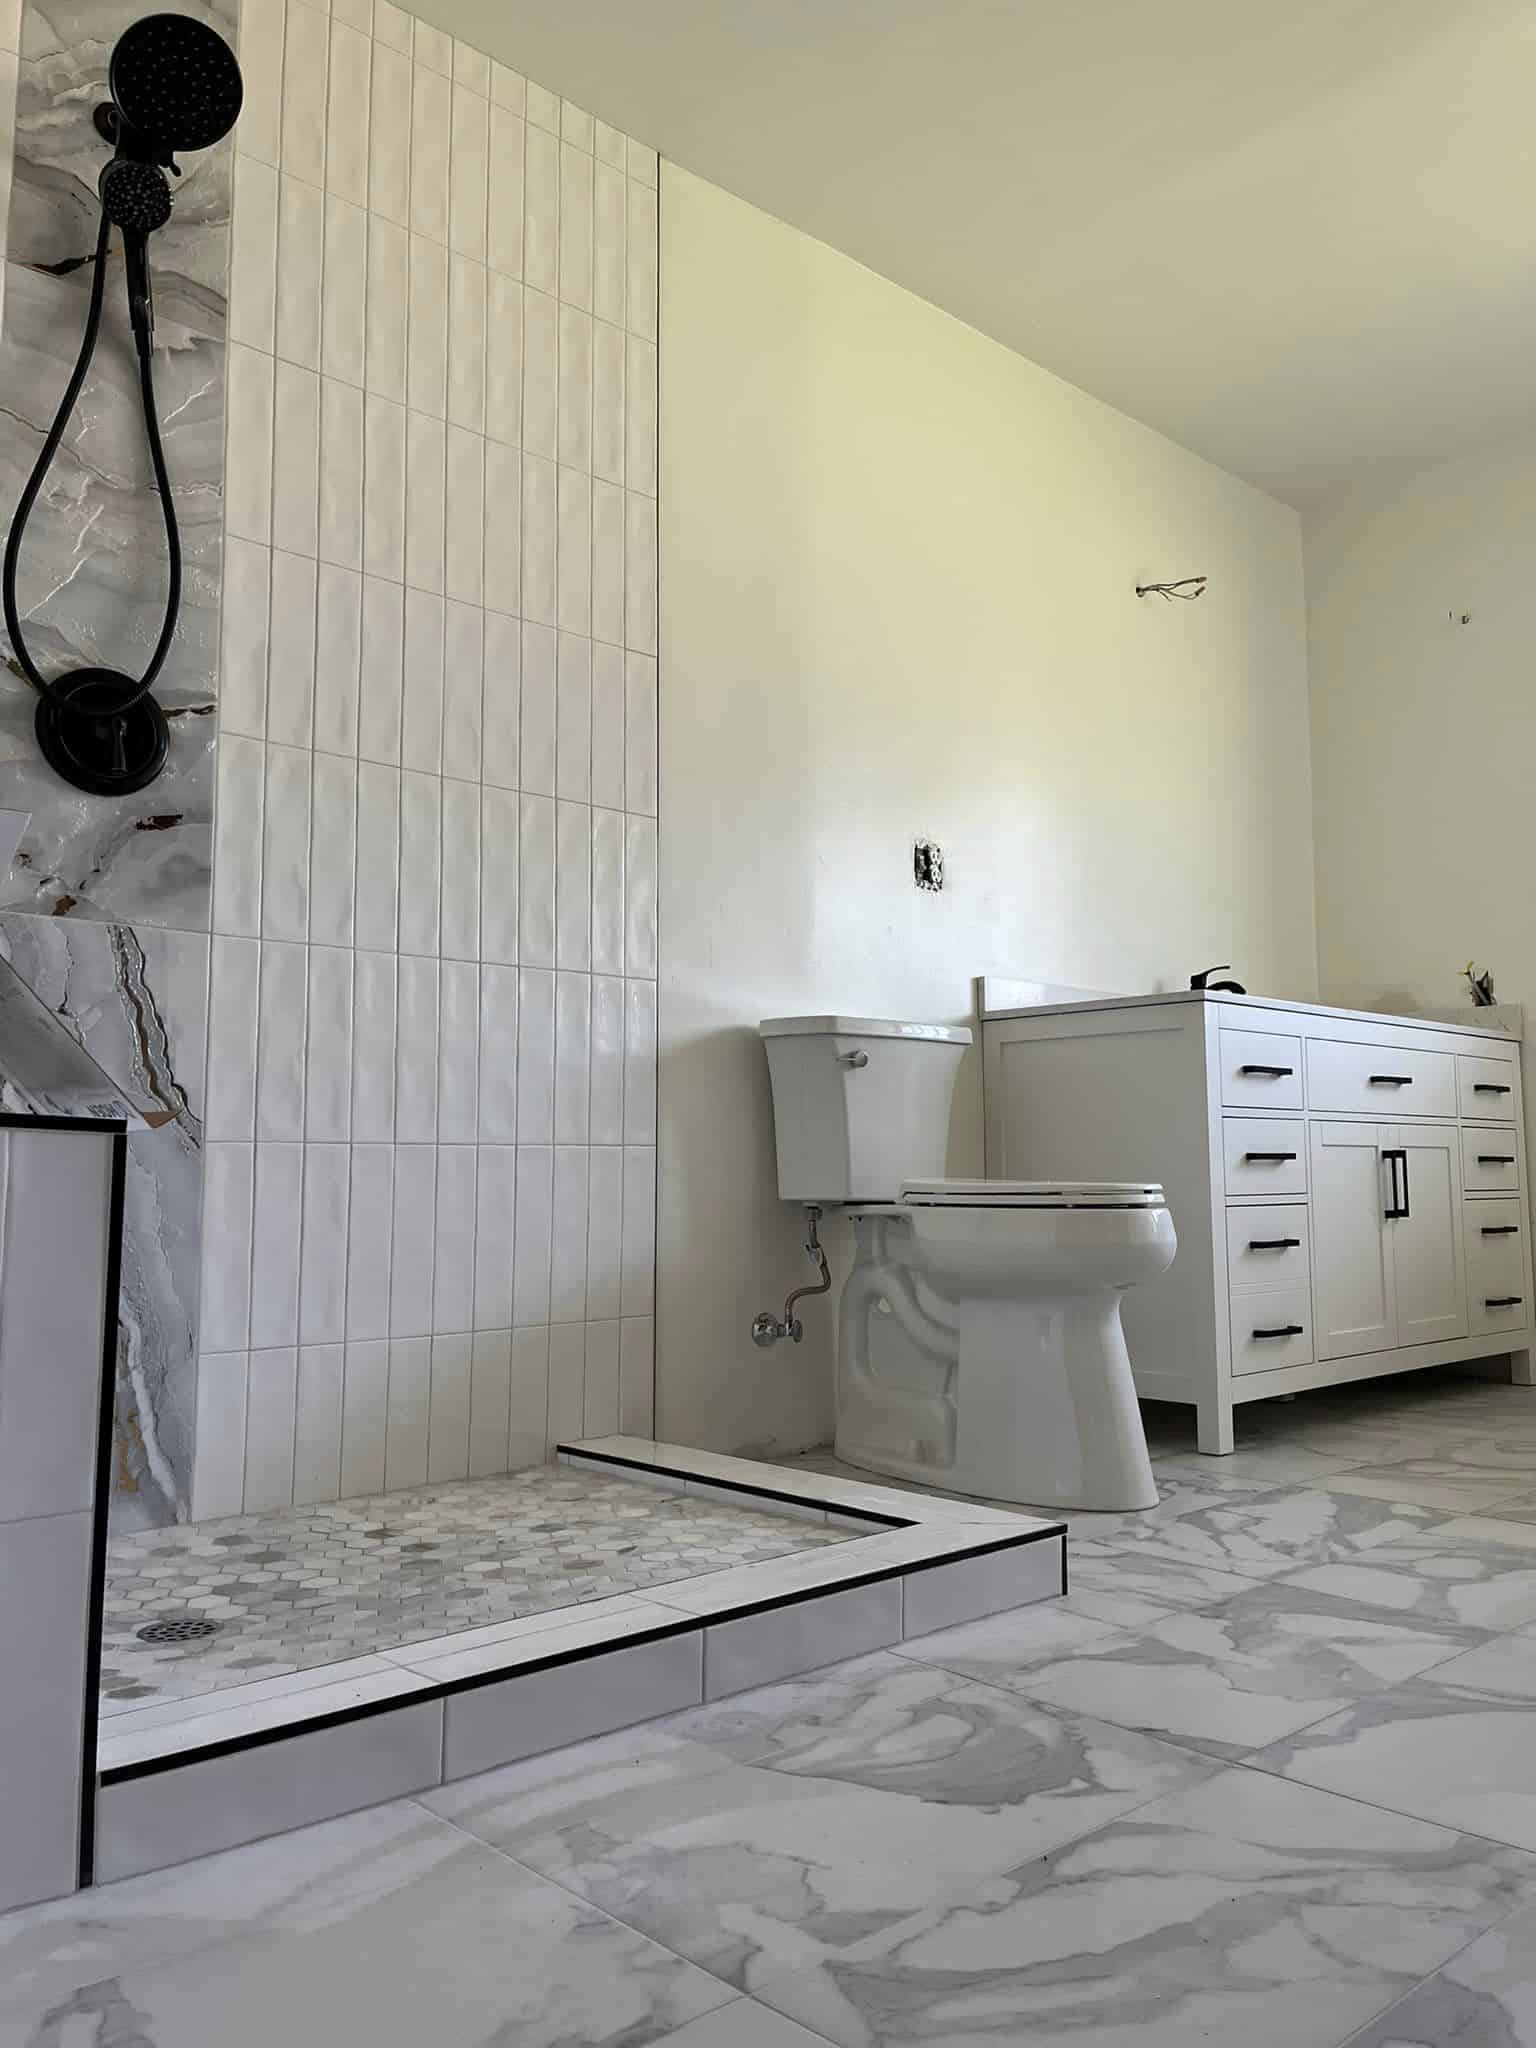
Final Touches
Cleaning Up
After completing the shower floor pan installation process, it is crucial to clean up the area meticulously. Remove any leftover debris or protective materials from the shower pan base. This ensures a tidy workspace and sets the stage for the final touches.
Dispose of all waste materials properly to maintain a clutter-free environment. By doing this, you pave the way for a seamless transition to the next phase of your project. A clean workspace not only enhances efficiency but also showcases your commitment to a job well done.
Preparing for Finishing
With the foundation in place, it’s time to prepare the shower area for the finishing touches. This involves assessing the corners and edges to ensure they are free of any obstructions or imperfections. By paying attention to these details, you set the stage for a flawless end result.
Consider seeking inspiration from various sources such as design handbooks or online resources. Visualizing the final outcome can provide valuable insights into how to enhance the overall look of your shower space. Utilize this inspiration to guide your decisions on the final pieces of the puzzle.
Final Inspections
Before proceeding with further installations, conduct a thorough inspection of the entire shower area. Check for any discrepancies or areas that may require additional attention. This step is crucial in ensuring that your shower pan installation is structurally sound and aesthetically pleasing.
If needed, consult with a helper or experienced members of your project team for their input. An extra set of eyes can often catch minor details that may have been overlooked. By engaging in this collaborative discussion, you can address any potential issues before they escalate.
Summary
You’ve now mastered the essential steps for installing a shower floor pan. By following these instructions diligently, you’ve ensured a sturdy base that will withstand the test of time. Remember, attention to detail is key in this process, from preparing the space to the final touches. Now, it’s time to put your skills to the test and enjoy a leak-free shower experience.
Don’t hesitate to reach out for professional help if needed, but with your newfound knowledge, you’re well-equipped to tackle this project confidently. Your bathroom upgrade journey begins with a solid foundation – quite literally! Get ready to revel in the satisfaction of a job well done!
Frequently Asked Questions
How important is it to level the subfloor before installing a shower pan?
Leveling the subfloor is crucial to ensure proper drainage and prevent water pooling in your shower. A level subfloor helps the shower pan sit securely, preventing leaks and structural issues in the future.
What is the purpose of a drain flange setup in a shower floor pan installation?
The drain flange setup ensures a watertight connection between the shower pan and the drain pipe. Proper installation prevents water leakage, maintaining the integrity of your shower system and protecting your home from water damage.
Why is leak testing necessary after installing a shower pan?
Leak testing is essential to confirm that your shower pan installation is watertight. By conducting a thorough leak test, you can identify any potential issues early on and address them promptly, ensuring a durable and long-lasting shower floor that prevents water damage.
How do gasket and drain screen contribute to the longevity of a shower pan?
The gasket creates a secure seal between the drain pipe and the shower pan, preventing water from seeping through. The drain screen acts as a barrier, preventing debris from clogging the drain, ensuring proper water flow and prolonging the lifespan of your shower pan.
What are the final touches typically involved in a shower floor pan installation?
Final touches may include caulking around the edges of the shower pan, applying a waterproof sealant to seams, and ensuring all fixtures are tightly secured. These finishing steps enhance the aesthetics, functionality, and durability of your newly installed shower floor pan.