Natural gas line installation and piping have revolutionized the way we power our homes and businesses. With a rich history dating back to the early 19th century, natural gas has become a cornerstone of modern energy systems. Installing natural gas lines requires precision and expertise to ensure safety and efficiency. From residential properties to large industrial complexes, the importance of proper natural gas piping installation cannot be overstated.
Pre-Installation Preparation Steps
Check Codes
Before beginning the natural gas line installation, it is crucial to check local building codes and regulations. These regulations ensure the safety and compliance of the project.
Clear Obstacles
Identify the installation area at home where the natural gas piping will be placed. Make sure to clear any obstacles that may hinder the installation process.
Gather Tools and Materials
To streamline the installation process, gather all the necessary tools and materials required for the project. This includes pipes, fittings, wrenches, and sealants.
Selecting Suitable Gas Pipes
Material Selection
When choosing gas piping for installation in your home, consider materials like steel, copper, or flexible options. Steel pipes are sturdy and suitable for underground installations due to their durability.
Copper pipes are corrosion-resistant and often used in residential settings for their flexibility. Roll copper offers easy installation with fewer joints, reducing the risk of leaks in home gas flow.
Flexible pipes provide versatility in installation, especially in tight spaces or areas prone to seismic activity. They offer ease of handling and can adapt to various layouts efficiently.
Determining Pipe Size
Selecting the correct pipe size is crucial to meet the gas demand of the household or building. Consult local codes and regulations to determine the appropriate diameter for optimal gas flow.
Smaller pipe sizes may lead to insufficient gas supply, causing appliances to underperform. Conversely, oversized pipes can result in pressure drops and energy wastage.
Consider factors such as total length of piping, number of bends and turns, and the BTU (British Thermal Unit) requirements of connected appliances when determining the ideal pipe size.
Evaluating Durability and Corrosion Resistance
Assessing the durability and corrosion resistance of gas pipes is essential for long-term safety and efficiency. Galvanized steel pipes offer robustness against external elements but are susceptible to corrosion over time.
Copper pipes excel in resisting corrosion but may not be suitable for all applications due to their malleability. Properly sealing joints with pipe dope enhances longevity and prevents gas leaks.
Regular maintenance checks are crucial to identify signs of corrosion early on, ensuring the integrity of the gas piping system. Consider factors like soil composition and moisture levels that can impact pipe longevity.
Disconnecting Gas Supply Safely
Turn Off
To disconnect the gas supply safely, start by turning off the main gas supply valve. This crucial step ensures no more gas flows into the lines.
Release Pressure
After turning off the valve, it’s essential to release any remaining gas pressure in the lines. This step reduces the risk of accidental leaks or combustion.
Use Proper Tools
When disconnecting the existing gas line, always use proper tools for a safe and secure process. Incorrect tools can lead to accidents and damage to the piping system.
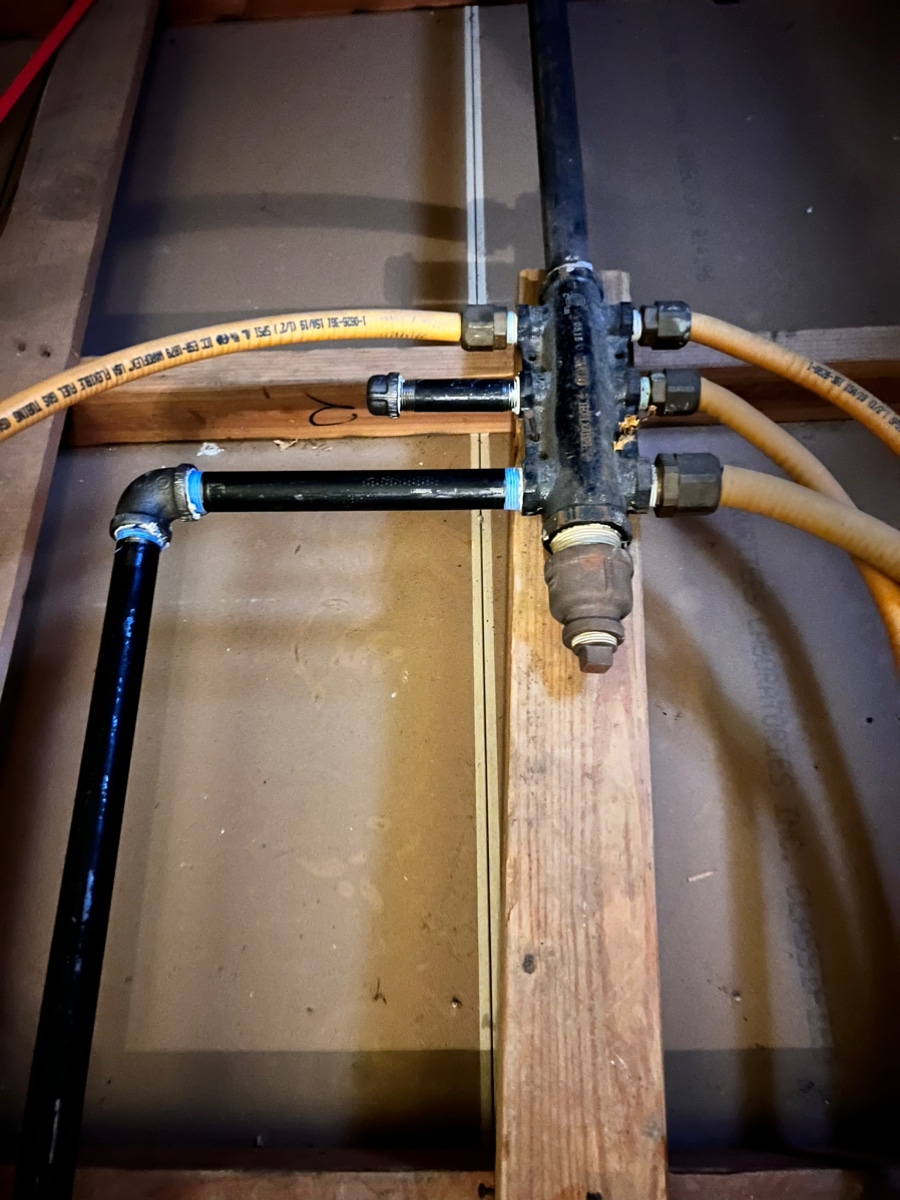
Connecting to Existing Gas Lines
Measure & Cut
To connect to existing gas lines, measure and cut the new gas line accurately to the required length. This ensures a precise fit.
Secure Attachment
Linking Gas Line to Appliance
Shut-Off Valve
To ensure safety and convenience, install a shut-off valve close to the appliance connection point. This valve allows you to quickly cut off the gas supply in case of emergencies.
Approved Connectors
When connecting the gas line to the appliance, always use approved connectors. These connectors are specifically designed for gas applications, ensuring a secure and leak-free connection.
Double-Check Connections
After linking the gas line to the appliance, it is crucial to double-check the connections for tightness and security. Any loose fittings can lead to gas leaks, posing a significant safety risk.
Ensuring Secure Connection Points
Tighten Fittings
Use the appropriate tools to tighten all fittings and connections securely to prevent any gas leaks. Check for loose connections by applying pressure to ensure they are properly secured.
Inspect all ends of the piping system to verify that each connection is tightly fastened. Look for any visible gaps or irregularities that may indicate a loose fitting.
Leak Detection
Apply a leak detection solution along the entire length of the gas line installation to detect any potential leaks. Check for bubbles forming at connection points, which could signify a leak that needs immediate attention.
Ensure that all sections of the natural gas piping are properly sealed with no signs of leakage. Contact a professional if you notice any leaks or suspect an issue with the installation.
Proper Sealing
Use thread sealant tape or pipe joint compound on all threaded ends before making connections. This helps create a tight seal and prevents gas from escaping through the threads.
Inspect the threading on each end of the pipes to ensure they are clean and free from debris that could affect the seal. Apply an appropriate amount of thread sealant material to guarantee a secure connection.
Final Checks
Before completing the installation, conduct a thorough final inspection of all connection points. Look for any potential areas where leaks could occur and address them promptly.
Verify that all pipe sizes match correctly and fit together seamlessly without any gaps or misalignments. This ensures a smooth flow of natural gas through the entire piping system.
Testing Gas Line Connection
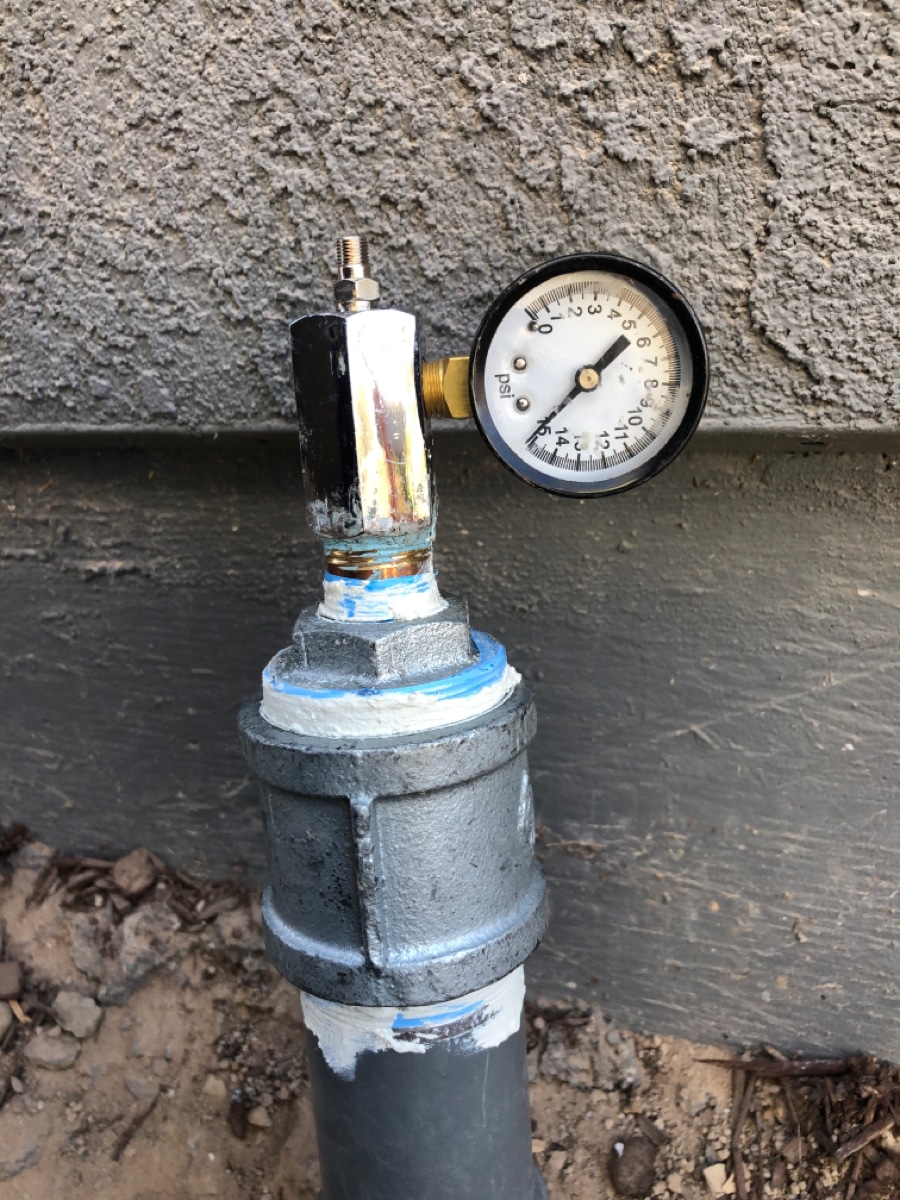
Pressure Test
To ensure the safety and efficiency of a natural gas line installation, conducting a pressure test is crucial. This test involves pressurizing the gas line to detect any gas leaks. By introducing air or nitrogen into the line, technicians can pinpoint any potential leaks by monitoring pressure levels.
Manometer Usage
When conducting a pressure test, using a manometer is essential for accurate measurement of gas pressure. This device provides precise readings, allowing technicians to determine if the pressure within the gas line meets the required standards. By observing the manometer readings, professionals can identify any irregularities that may indicate leaks.
Maintaining Pressure
Verifying that the gas line can maintain pressure without any drops is a critical step in ensuring its integrity. Technicians monitor the pressure gauge closely to check for fluctuations over a specific period. A stable pressure reading indicates that the gas piping installation is secure and leak-free, providing peace of mind to both residents and service providers.
Opening Gas Line Safely
Reintroducing Gas into the System
To open the gas line safely, gradually turn on the main gas supply valve to reintroduce gas into the system. This gradual approach helps prevent sudden pressure surges that could damage the piping.
Ensure that the valve is turned in a slow and controlled manner to allow the gas to flow steadily through the pipes. By doing so, you can safely restore the gas supply without causing any disruptions or leaks in the system.
Monitoring for Gas Leaks
After opening the gas line, it is crucial to monitor for any unusual smells or sounds that could indicate a potential gas leak. Even a small leak can pose serious safety hazards, so it’s essential to remain vigilant.
Use a gas leak detector or a mixture of soap and water to check for any escaping gas. If bubbles form at any connection points or along the piping, this indicates a leak that needs immediate attention to prevent any accidents.
Ensuring Proper Ventilation
During the installation process and after opening the gas line, ensure proper ventilation in the area where natural gas is being used. Adequate ventilation helps disperse any accumulated gas fumes and reduces the risk of exposure to harmful gases.
Install vents or exhaust fans in enclosed spaces where natural gas appliances are located to ensure that any excess gas is safely vented outside. This simple step can significantly improve indoor air quality and enhance overall safety.
Understanding Installation Costs
Total Expenses
Calculate total costs by including materials, labor, and permits necessary for a natural gas line installation. Ensure to request detailed quotes from professionals.
Factor in any additional costs for unexpected repairs or modifications that may arise during the installation process.
Comparing Quotes
When analyzing quotes for natural gas piping installation, consider not only the average cost but also the breakdown of expenses. Compare prices from different professionals to ensure you are getting a fair deal.
Be wary of unusually low quotes as they may indicate subpar materials or workmanship, leading to potential issues down the line.
Additional Costs
Apart from the basic expenses, be prepared for potential extra costs. These could include fees for trenching, landscaping restoration, or obtaining permits.
Ensure to have a contingency budget in place to cover any unforeseen expenses that might occur during the natural gas line installation process.
Closing Thoughts
In mastering the art of natural gas line installation, you’ve equipped yourself with the knowledge to undertake this task safely and efficiently. Selecting the right pipes, ensuring secure connections, and testing diligently are crucial steps in this process. By understanding installation costs and following each step meticulously, you can enjoy a seamless transition to using your gas appliances.
Remember, safety is paramount when dealing with natural gas. If you ever feel unsure or encounter difficulties during the installation process, don’t hesitate to seek professional help. Your diligence and caution will pay off in the long run, ensuring a secure and functional gas line setup for your home.
Frequently Asked Questions
Is natural gas line installation a DIY project?
Natural gas line installation is not recommended as a DIY project due to safety risks and legal regulations. It is crucial to hire licensed professionals with expertise in handling gas lines to ensure proper installation and compliance with safety standards.
What are the key factors to consider when selecting suitable gas pipes?
When selecting gas pipes, consider factors such as material durability, size compatibility, pressure rating, and corrosion resistance. Consulting with a professional installer can help determine the most suitable type of gas pipe for your specific installation needs.
How do I safely disconnect the gas supply before installation?
To safely disconnect the gas supply, turn off the main gas valve and pilot lights, if applicable. Avoid using any electrical devices or creating sparks near the gas line. It’s crucial to follow proper procedures to prevent accidents and ensure a safe disconnection process.
Why is testing the gas line connection important after installation?
Testing the gas line connection is essential to detect any leaks or issues that could pose safety hazards. By conducting thorough testing using appropriate methods and equipment, you can ensure that the gas line is properly installed and functioning safely before use.
What are some common signs of an insecure gas line connection?
Common signs of an insecure gas line connection include hissing sounds near the gas line, unusual odors like rotten eggs (indicating a leak), visible corrosion on pipe joints, and fluctuating gas pressure. If you notice any of these signs, it’s crucial to address them promptly by contacting a professional for inspection and repairs.