7 More Maintenance Tips for Water Heaters
- Maintenance Tips Number 1: Preparing the water heater.
- Maintenance Tips Number 2: Overhead clearance
- Maintenance Tips Number 3: Choosing and replacing the anodes
- Maintenance Tip Number 4: Adding a second anode rod
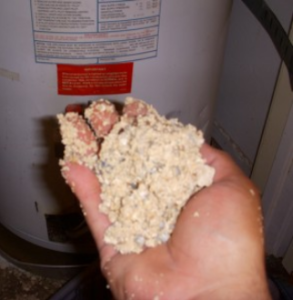
- Maintenance Tips Number 5: Removing the sediments
- Maintenance Tips Number 6: Installation of a curved dip tube and flushing the water heater
- Maintenance Tips Number 7: Removing sediments with a muck vac
Maintenance Tips Number 1: Preparing the water heater.
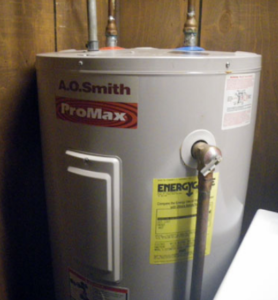
In the event that you have an electric water heater, ensure that you turn off the power. You will then need to turn off the water supply to the heater by closing the cold water line valve. This valve is situated at the top of your heater, on the right side.
In the house, open the hot water tap which allows air pressure to be able to exist through the tap. You will need to also open the drain valve which resembles a hose bibb; it’s at the bottom of your water heater.
Have a gallon or more of water out of the heater. When you are working on the heater ensure that no one is using hot water.
Maintenance Tips Number 2: Overhead clearance
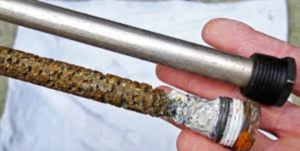
The anode rods are almost the same height as the water heaters’. The water heater is usually close to the ceiling; therefore the entire anode rod cannot be pulled out. Despite this, you will have to pull the anode rod as high as you can. Check the rod to see if its core wire is bare and if there is any flaking on the rod’s surface; reinstall the rod in case it does not have any of the mentioned problems.
The top of the anode rod is the part that is usually affected as it’s the part in contact with hot water. Bend the rod at its middle that is against heater’s opening then pull it out. Bend it at the middle, straightening it at its opening if you want to put in a new rod.
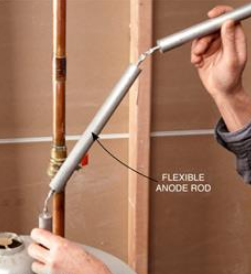
In the event that you have an anode with a wobbly top when you are screwing it, straighten it as much as possible after pulling it half way. If you have an overhead clearance that is less than 2 feet, you will need to get a link-type anode rod. This is because it has “sausages” links made of metals fastened together. It is extremely easy to install.
Maintenance Tips Number 3: Choosing and replacing the anodes
When it comes to metals used to making anode rods magnesium, zinc and aluminum are used. Use magnesium anode if you have soft water naturally. Installation of the aluminum anode is essential when you have hard water or using water that is softened using heavy salts.
It is also recommended that you install aluminum anode when you replace your deteriorating anode. Installation of magnesium anode to replace your deteriorating anode can cause a negative impact on your water or cause pressure release from your faucets.
Avoid the use of hot water in cooking if you are installing aluminum anode. This is because according to modern science, aluminum in water can cause the Alzheimer’s disease. For zinc anode, it is quite rare for you to find them installed water heaters.
The effect of sulfur smell in water can be counteracted by the use of zinc. It is important that you note only 10% of actual zinc is used in zinc anode, as the rest of the anode is aluminum. It is also not recommended for you to either cook or consume water from zinc anodes.
You will have anodes having a protective current of about 2 feet. In case you have anodes that are too tall for your water heater you can cut them. It’s recommended that you get anodes that are 3 feet and 8 inches.
Maintenance Tip Number 4: Adding a second anode rod
Do you have an exposed hexagonal head shape on top of your water heater? You can install another anode which will give your heater more protection. As long as you have the hexagonal head, you can unscrew your hot water outlet. This is the pipe that is on top of your water heater on the left side, this is where you can be able to install a combination of anodes.
Ensure that the anode rod contains brass nipple that is 2 to 6 inches. When it comes to adding another anode rod, it is quite a task. Therefore contact a plumber.
Maintenance Tips Number 5: Removing the sediments
When you have sediments build up in your water heater, there are signs that will tell you. They include;
- Having a lot of noise in case you have a gas water heater
- A foul odor coming from your water heater
- Having a low element burnout in the event that you have an electric water heater
- In case you have your hot water running out before it is used yet you have an electric heater
When sediment piles up, the lower heating element of an electric heater will be unable to heat water as it’s covered. Gas heaters have sediments settle at the bottom where the flame is used to heat the burner plate. Water will be covered with sediments, becoming superheated steam, which releases pressure which sounds like a row inside the heater.
Installation of the curved dip tube is essential for getting rid of problems with your heater. You can also have a plumber install a special Muck-vac tool or dissolve the sediments in the heater. Shopvac is used in case you have an electric heater; it sucks sediments out via the low heating element.
Maintenance Tips Number 6: Installation of a curved dip tube and flushing the water heater
When you purchase a water heater, it comes with a dip tube in most cases. This is a piece of a plastic pipe that is found inside the heater. It runs from the top of the heater’s inlet of cold water all the way to the bottom of the heater
The dip tube gets cold water near the bottom of the heater so that it can be heated. Sediments build up at the bottom of the heater except on the part where we have the dip tube. This is because; water that comes out of the tube pushes the sediments away.
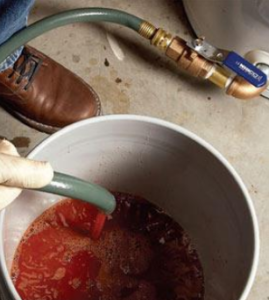
The dip tube curves at an angle of 90 degrees; this causes the heater’s bottom to be swept due to the incoming cold water. The sediments will be picked and will stay in the suspension of water. When you open the drain valve, then let cold water get into the heater for about 5 minutes can enable you to clear a lot of sediments.
Installation of a curved dip tube
When installing curved dip tube, unscrew the cold water nipple first. This is a pipe on top of the heater on the right side of your hand. In the cold water inlet, stick curved handled set pliers in the hole twisting the tube up and out of the heater. Have the tube high enough for you to be able to pull it out using your hand.
In case the hole is all rusty, you will have to first scrap off the rust. Mark the new dip tube at the top where it has curve points. Wrap around 8 times using Teflon tapes the top of the tube where you’ll be screwing. Insert and point the dip tube which will allow water to swirl along in the heater, not to forget pointing it away from the drain valve.
Ensure that the drain valve is fully open when you are draining water from your water heater. Also, have the curved dip tube installed even if you are using a different method to clean the heater. Have optimum flushing done after every 6 months or more frequently.
Maintenance Tips Number 7: Removing sediments with a muck vac
Hire a professional plumber in order to use this tool in removing sediments from your heater. This tool is expensive and it also requires knowledge on how to use it. This method entails hands off in removing sediments.

